Part 2: Cloudflare ZTNA - TLS Inspection
In Part 1, we enabled TLS inspection to get HTTP policies working against HTTPS traffic — that’s how we blocked social media sites on port 443. We got it working, but I didn’t really explain what TLS inspection is actually doing under the hood. Let’s fix that.
TLS inspection is essentially a man-in-the-middle. When your device initiates an HTTPS connection, Cloudflare Gateway intercepts it, terminates the TLS session, decrypts the traffic, inspects it, and re-encrypts before forwarding to the destination. Same thing in reverse on the way back. The Cloudflare root CA certificate we installed on the client device is what makes this work without your browser throwing certificate errors on every page.
Blocking social media sites was a decent demo, but honestly, you don’t even need TLS inspection for that — a DNS policy can do the same job. The real value of TLS inspection is that Cloudflare Gateway can now see the full HTTP request and response — headers, body, uploaded files, form data, everything. That’s what unlocks features like Data Loss Prevention and malware scanning, which are completely blind without it.
Why is it required?
Think about this — an employee is working with a spreadsheet containing customer social security numbers. They need to access it from home later, so they upload it to their personal Google Drive. No malicious intent, just convenience. Without TLS inspection, Gateway sees a connection going to drive.google.com over HTTPS and that’s it. It has no idea what’s inside that upload. The SSNs leave your network, sitting on a personal account you have zero control over.
Now flip the scenario. A corporate laptop gets compromised. The malware is smart enough to exfiltrate data over HTTPS — maybe to a cloud storage endpoint, maybe to a C2 server disguised as a legitimate service. Again, without TLS inspection, Gateway sees encrypted traffic going to what looks like a normal HTTPS destination. It can’t inspect the payload, can’t scan for sensitive data patterns, can’t flag the exfiltration. The data is gone.
Both problems — accidental and malicious — have the same root cause. Encrypted traffic is opaque to your security stack unless you break it open and look inside. TLS inspection gives you that visibility. And once you have it, you can layer on DLP to catch the SSNs before they leave, or scan for malware signatures in file uploads.
Prerequisites
Before we get into DLP, let’s make sure the basics from Part 1 are still in place. TLS inspection should be turned on and the Cloudflare root CA certificate should be properly configured on your device.
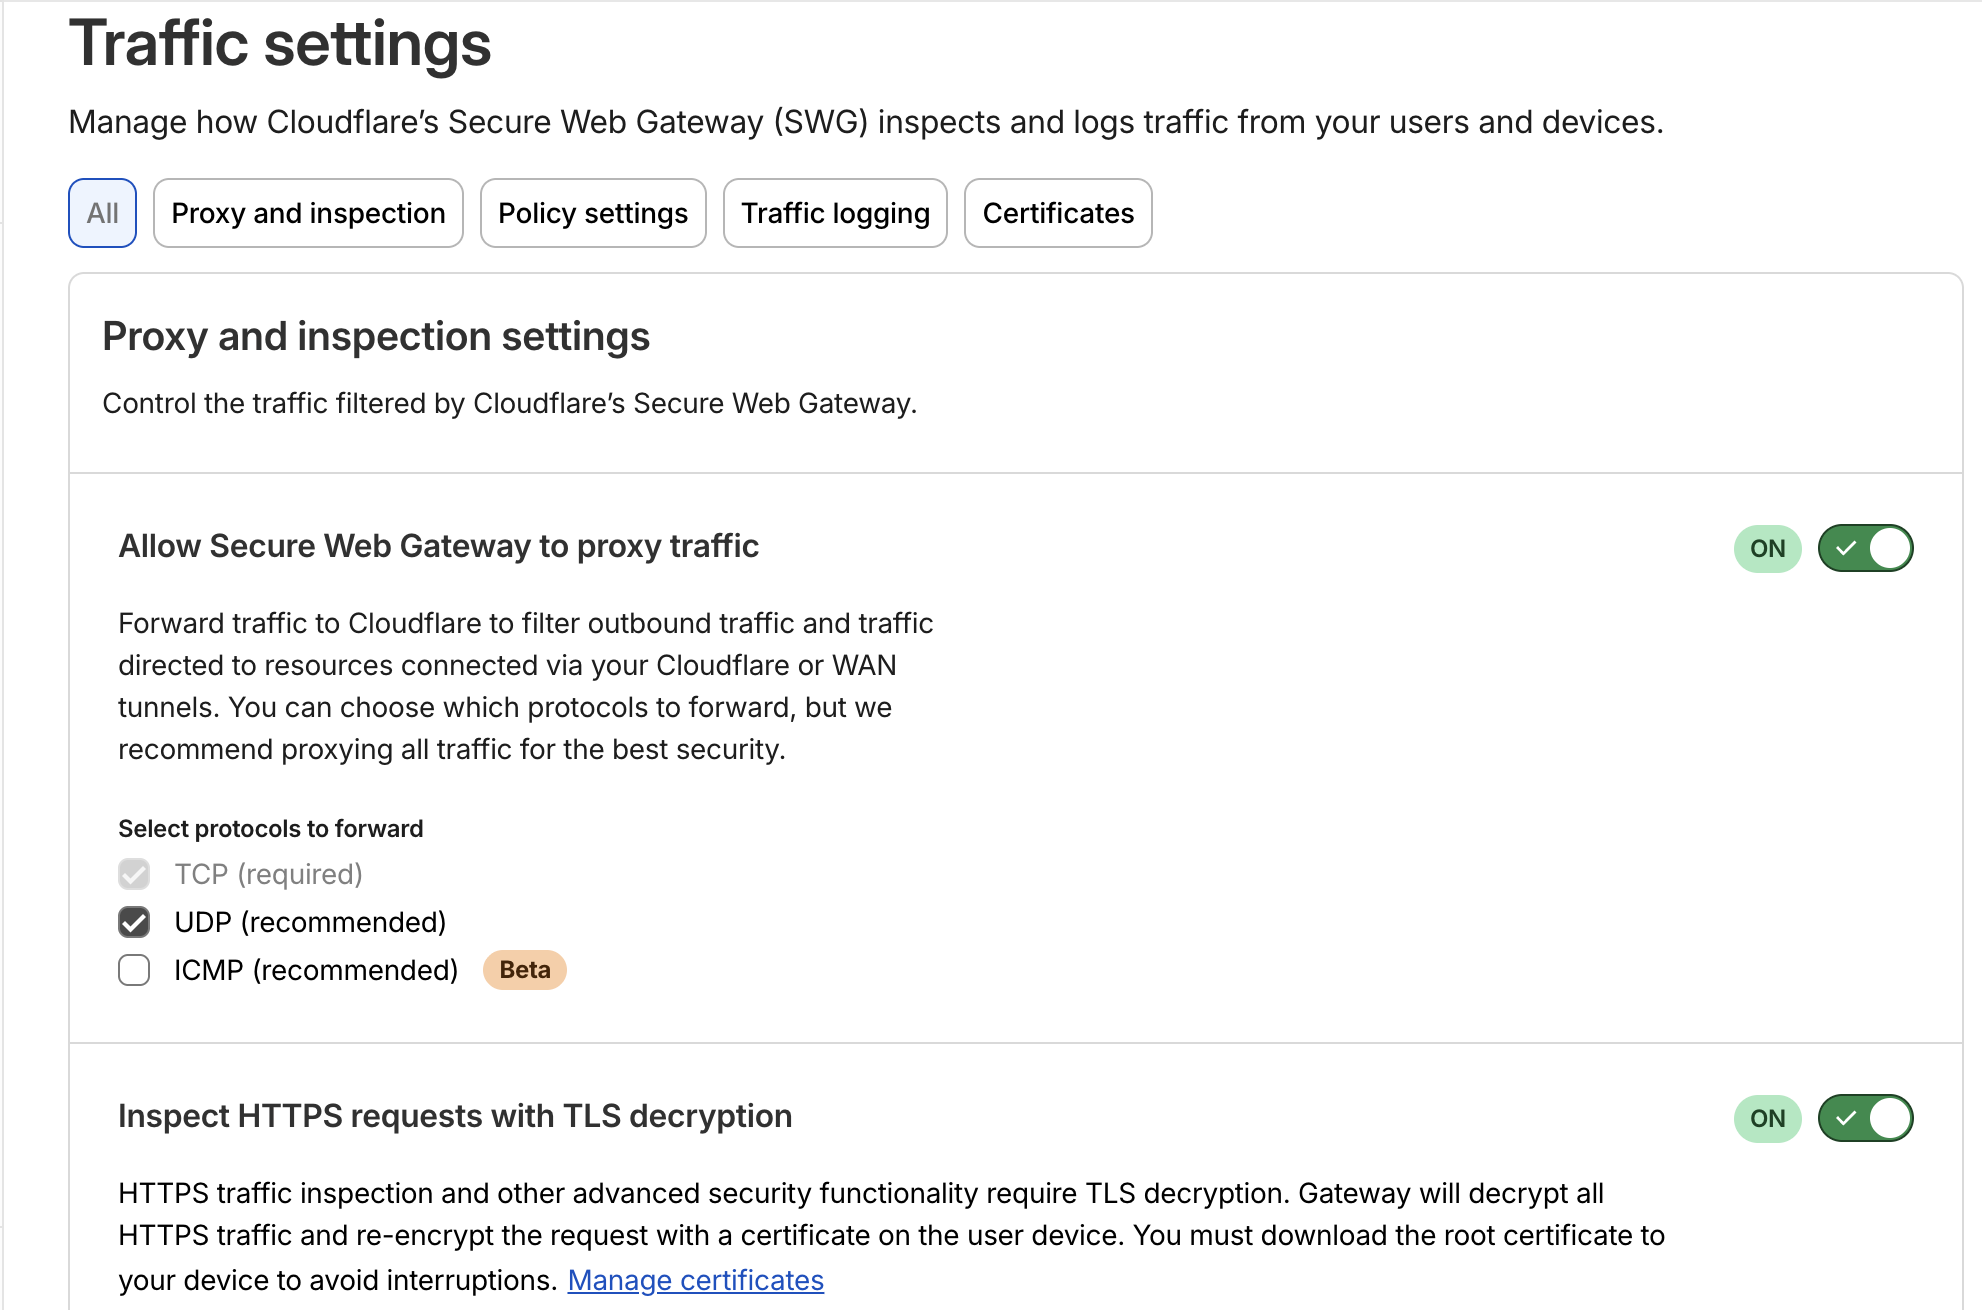
Proxy and TLS Decyption Turned On
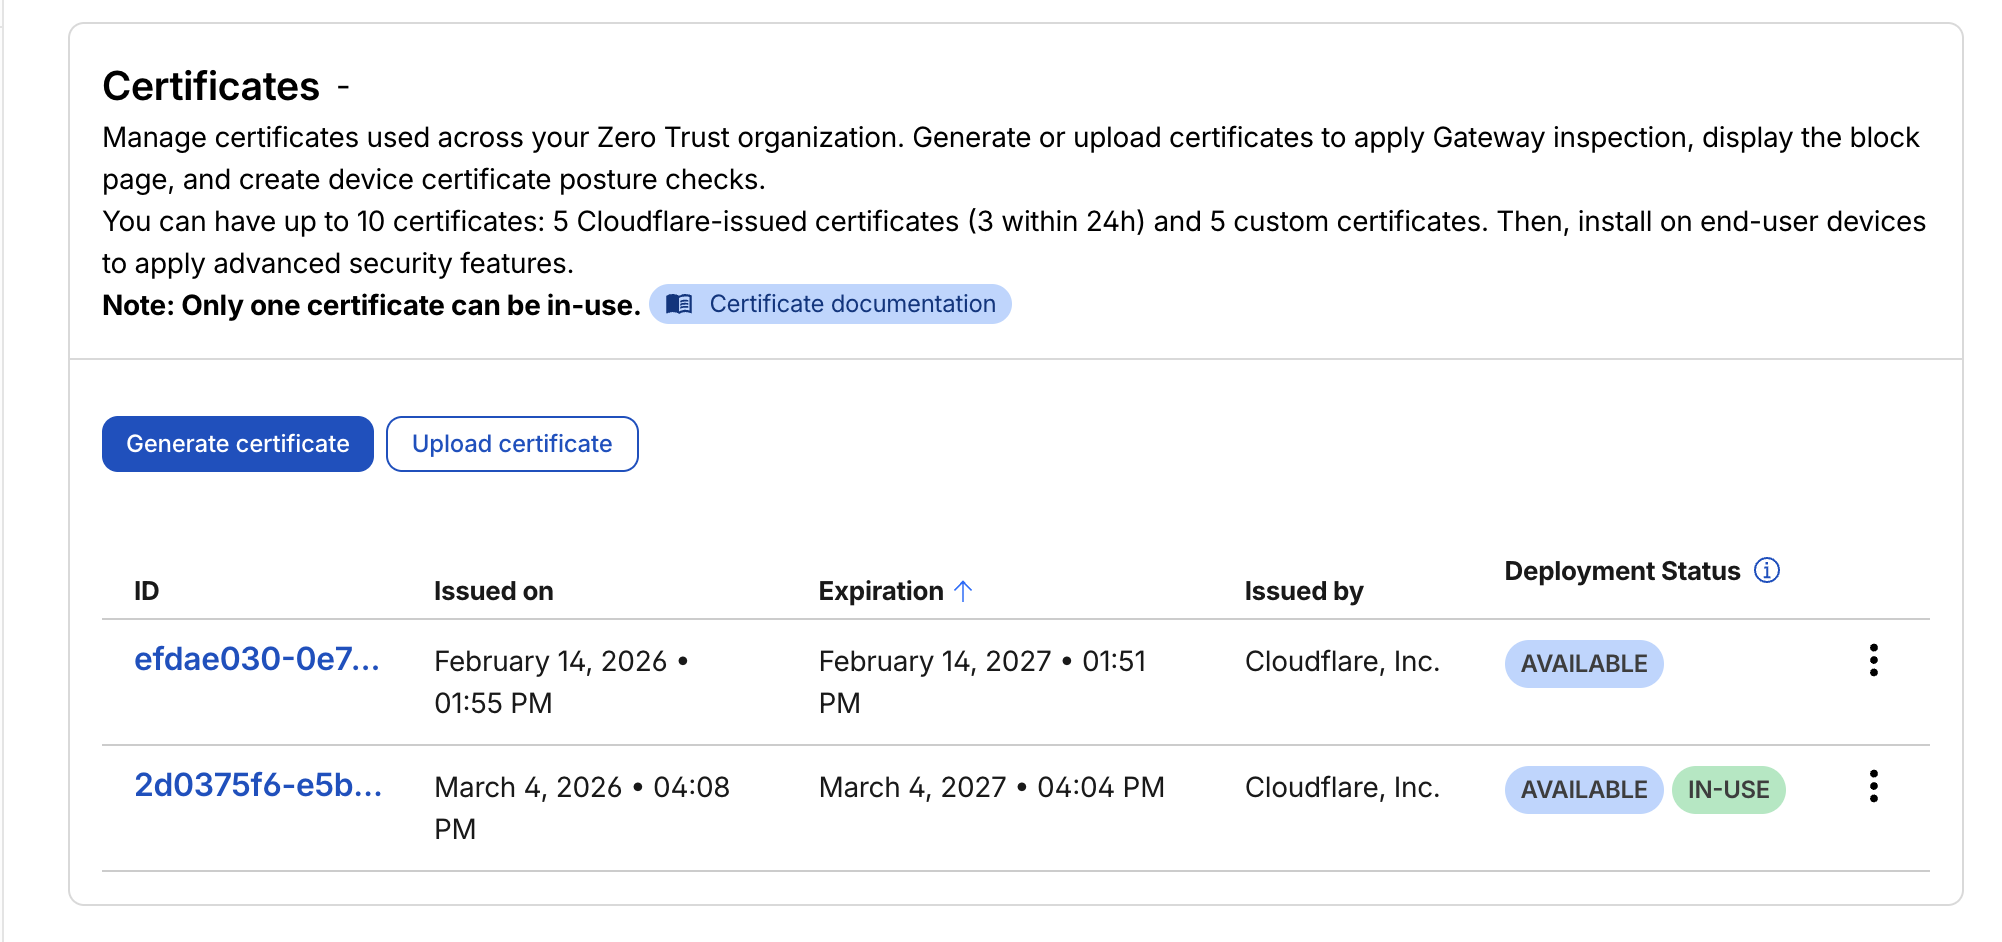
CA Certificate for TLS Decryption

MaC OS KeyChain Trusting the Custom Cloudflare CA
If either of these isn’t set up, go back to Part 1 — nothing that follows will work without them.
Implementation
The plan is simple — create a file with US Social Security Numbers, try uploading it to Google Drive, and see if Cloudflare catches it. A sample file with US SSN is present inside the assets directory for testing.
Terraform Init, Plan and Apply
Set the dlp_policy flag to true followed by terraform apply.
module "cloudflare_web_filtering" {
  source = "./cloudflare/1.web_filtering"
  providers = {
    cloudflare = cloudflare
  }
  unique_id      = var.unique_id
  account_id     = var.account_id
  dns_policy     = false
  http_policy    = false
  network_policy = false
  dlp_policy     = true
}
Terraform Provisioned Resources on Cloudflare
Head over to Zero Trust → Traffic Policies → Firewall Policies → HTTP and you should see a Data Loss Prevention (DLP) HTTP Policy listed there.
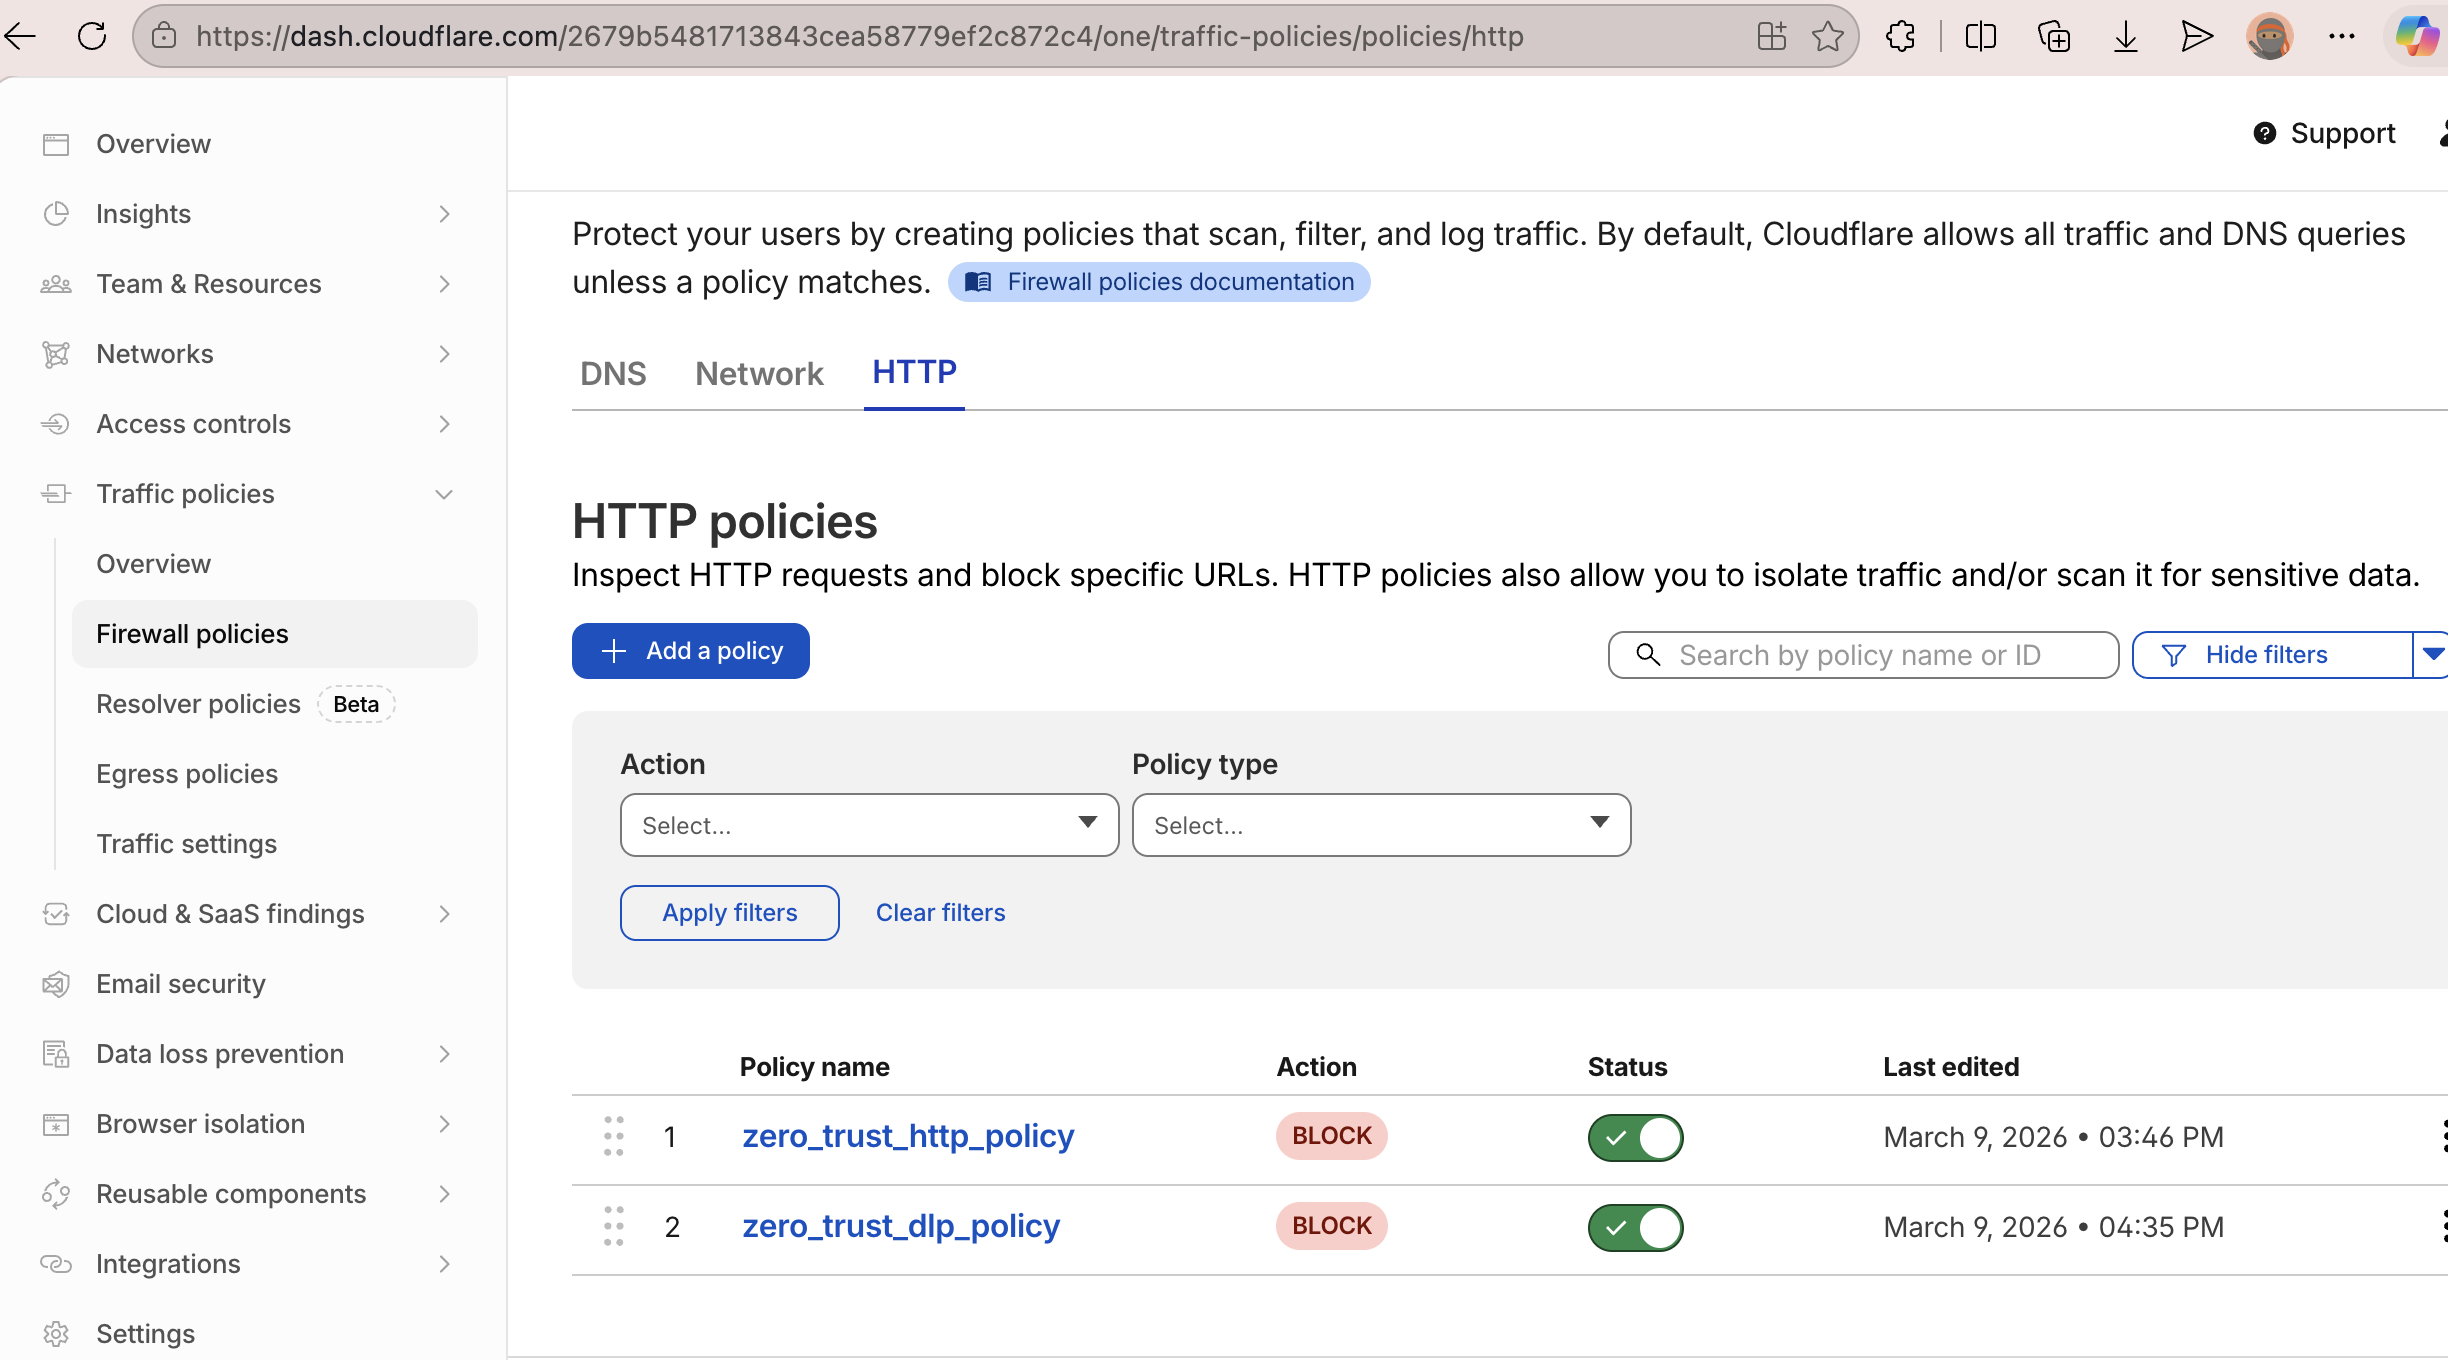
HTTP Policy for DLP
The above policy uses the below predefined DLP Profile.
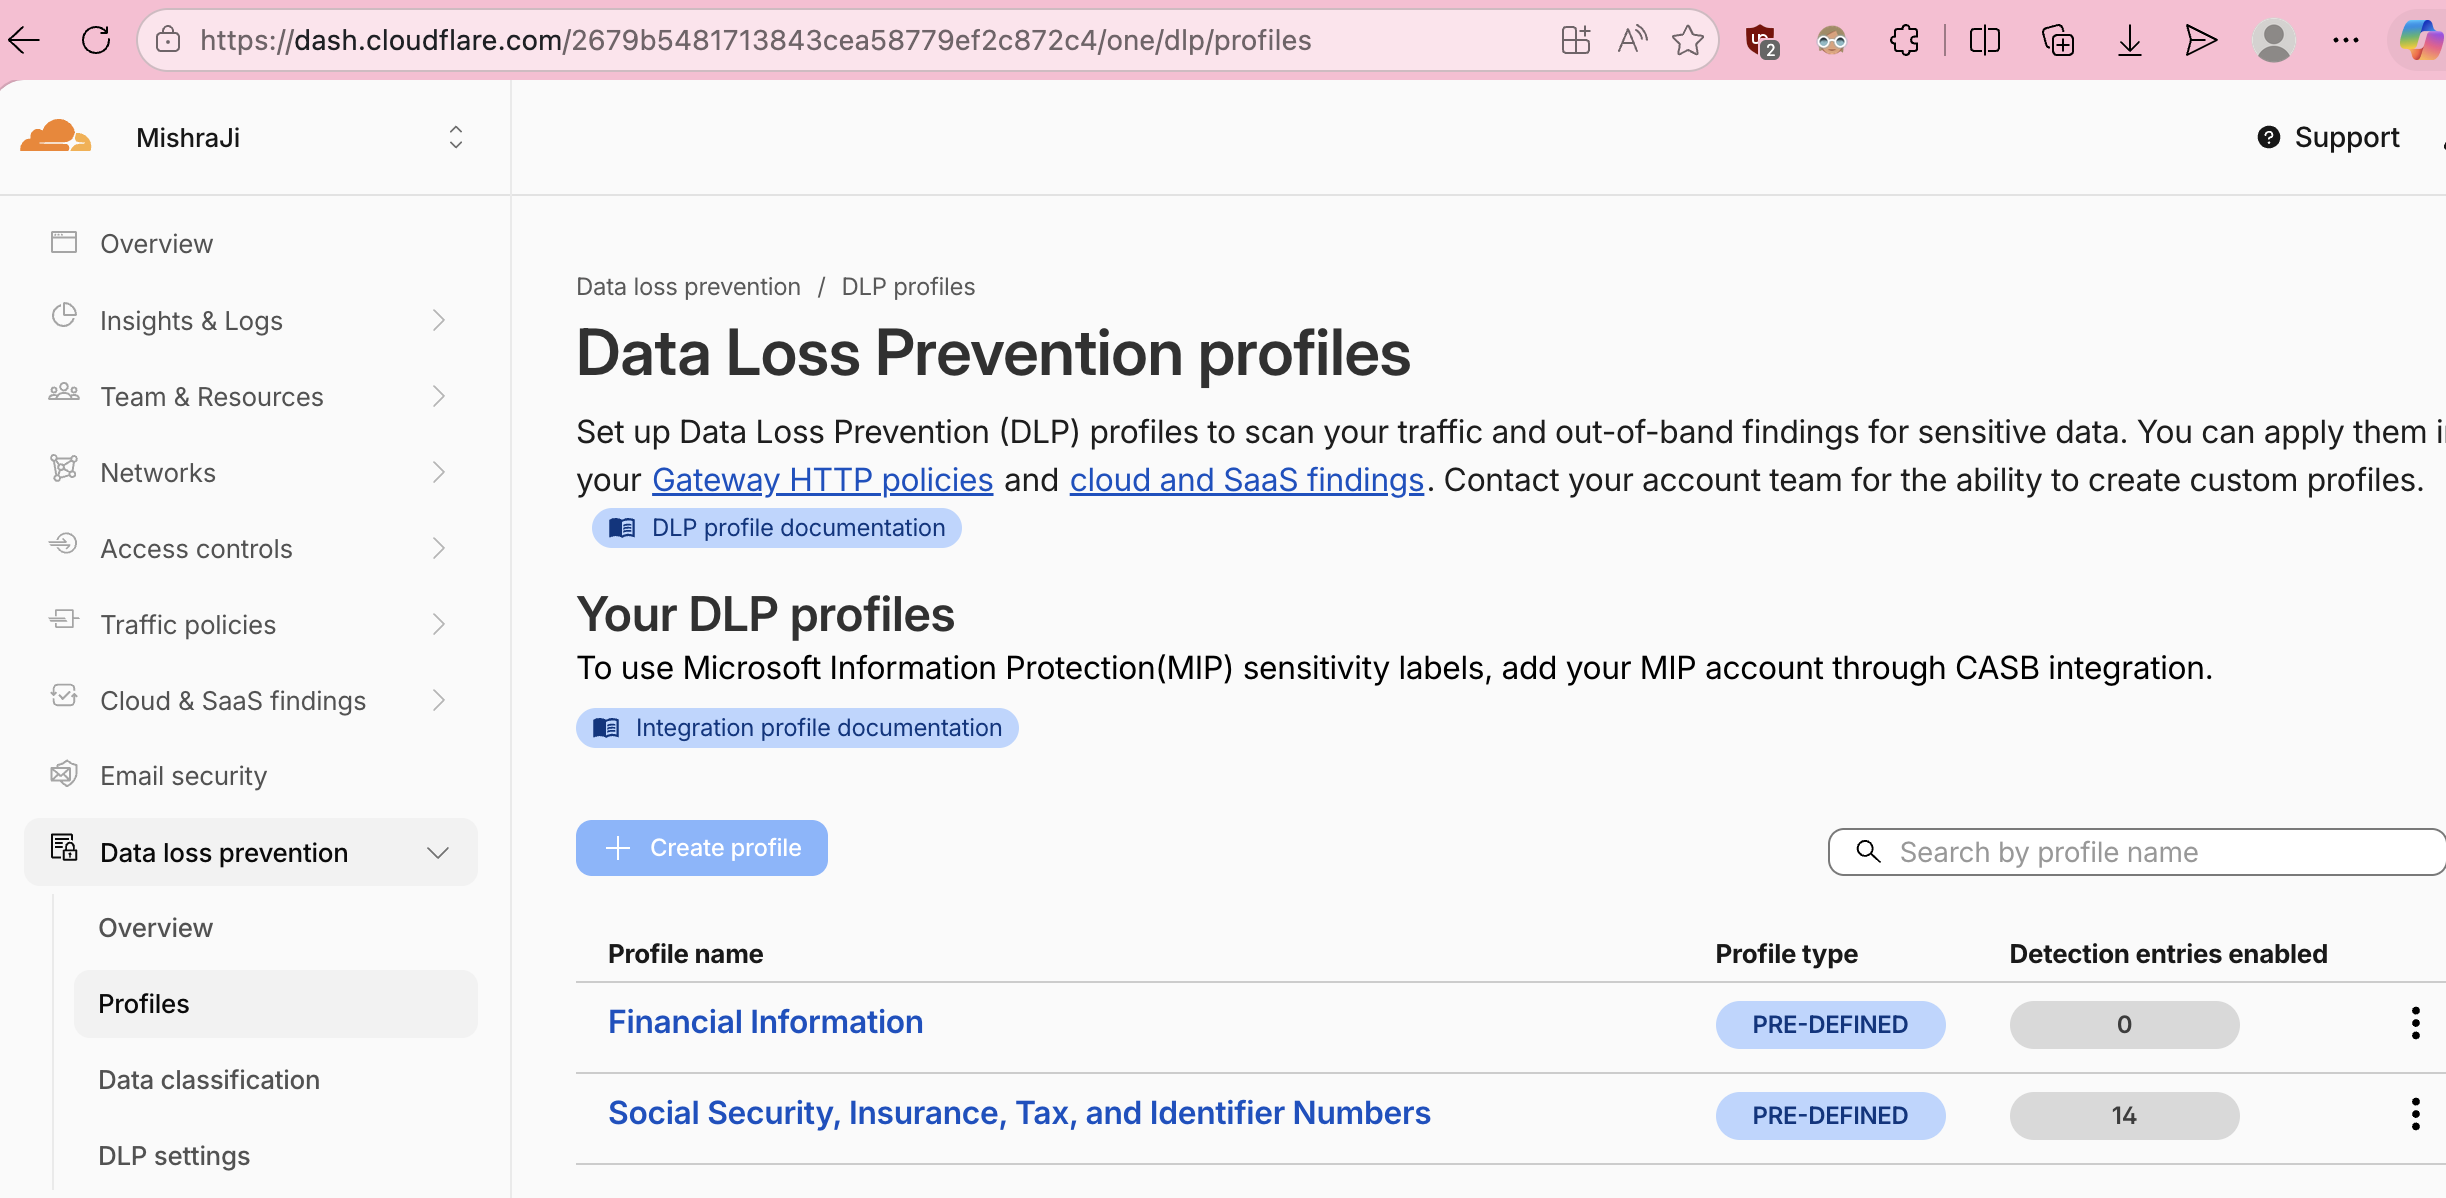
Predefined DLP Profiles
Testing
With the DLP policy in place, I tried uploading the file to Google Drive. It didn’t go through, the download was stuck forever!
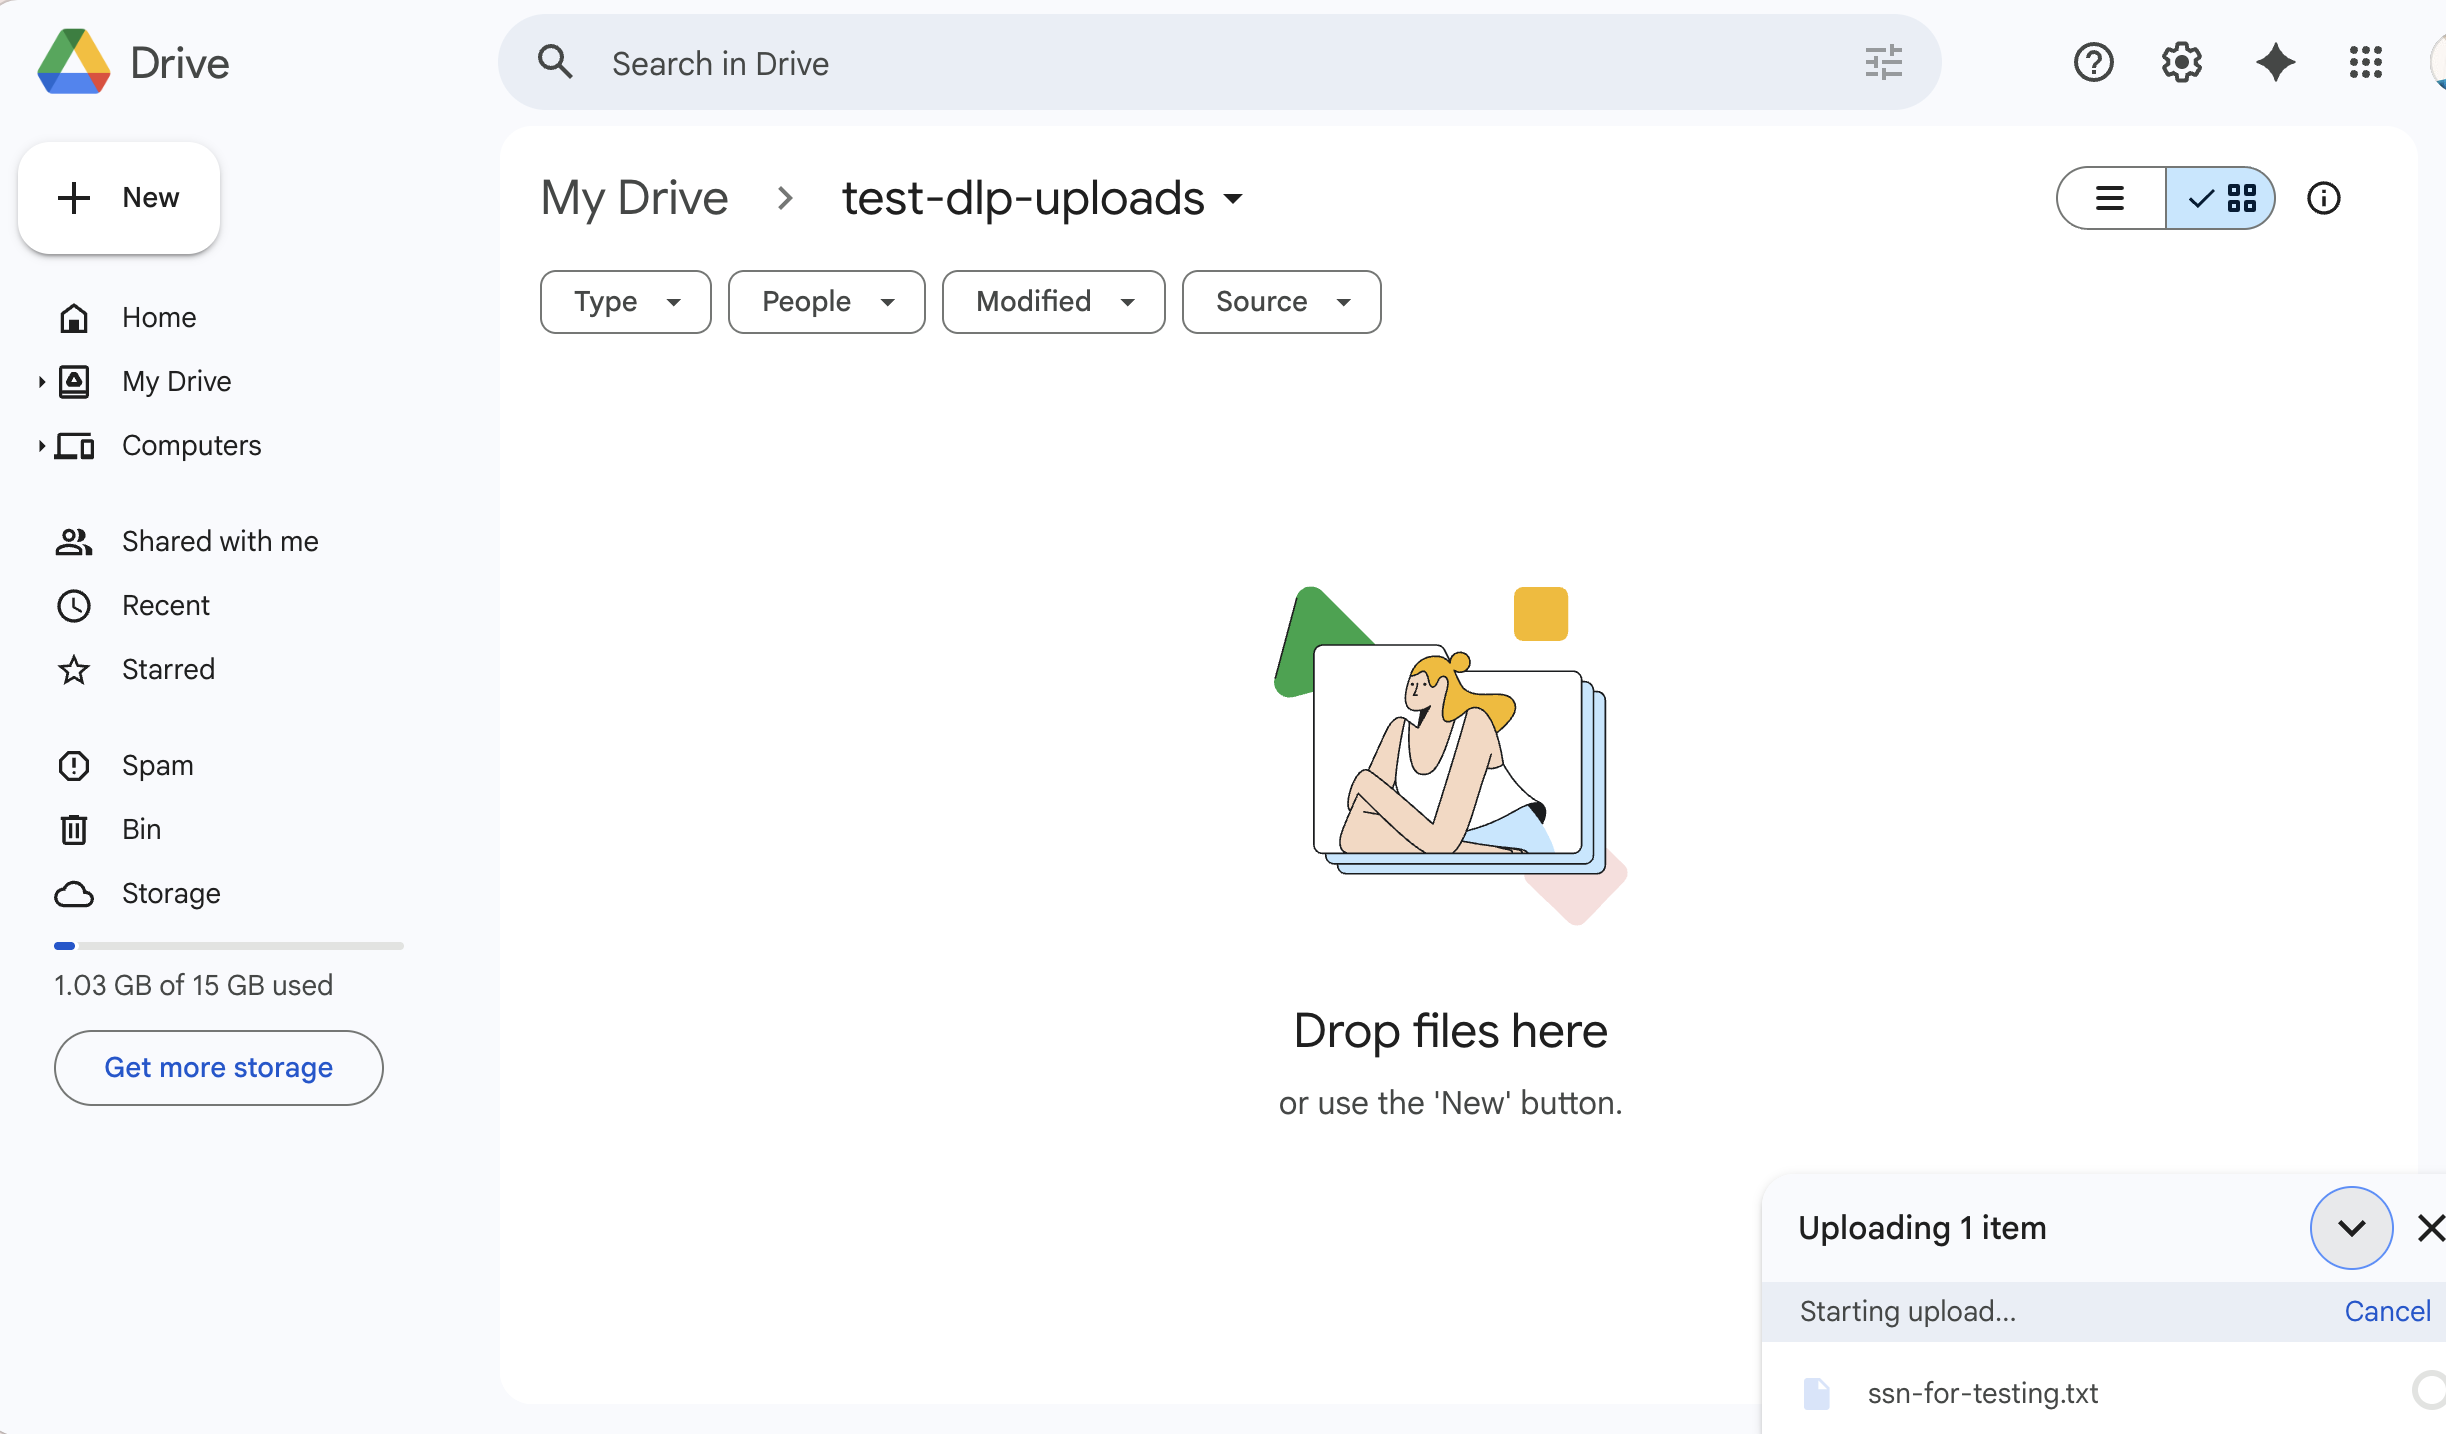
Google Drive upload failed
And Cloudflare’s Gateway logs confirm the block.
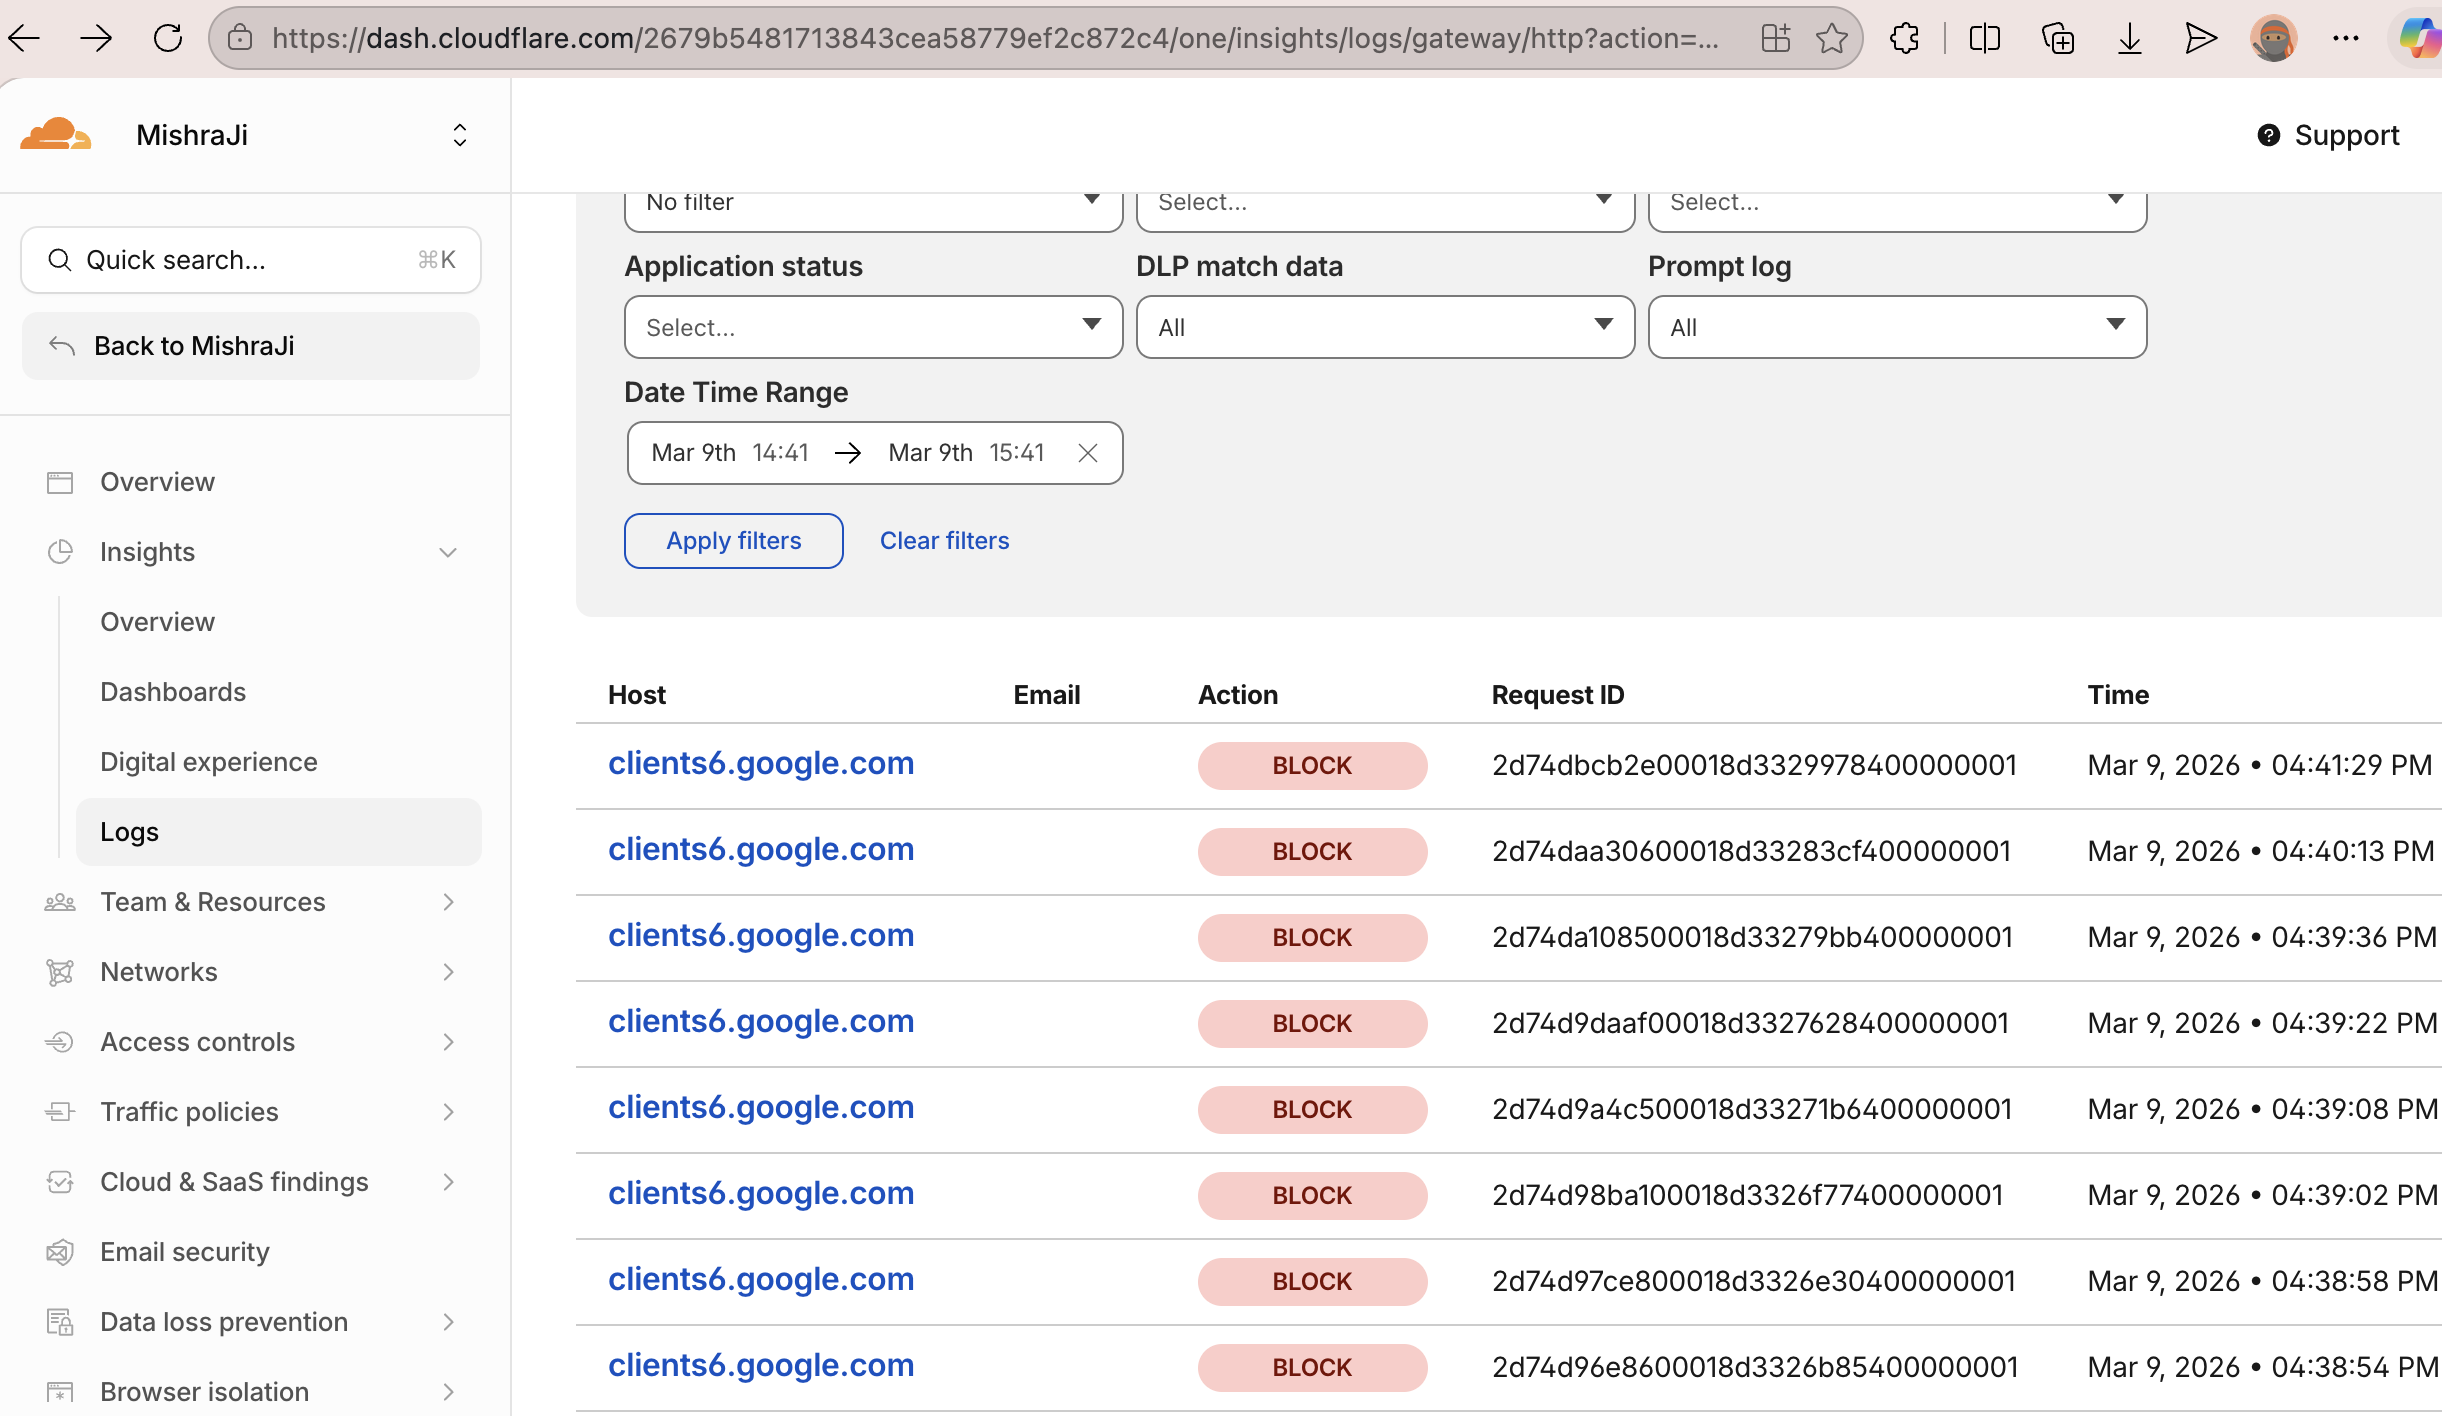
Cloudflare logs showing blocked traffic
That’s DLP doing its job. The file never made it to Google Drive. Gateway decrypted the upload via TLS inspection, scanned the contents against the SSN detection profile, matched it, and killed the request. Without TLS inspection enabled, this upload would have gone through silently.
A word of caution — false positives
This is where things get annoying. DLP with predefined profiles is not surgical. It’s regex-based pattern matching, and anything that looks like an SSN structurally can trigger a block.
I found this out the hard way. With the SSN DLP policy active, Cloudflare blocked me from accessing my own blog. Not a shady site, not a file upload — my Medium blog. The false positive rate was significant enough to be disruptive.
Deploy and test the policy first in a dev/staging environment. Understand what’s getting flagged before you start blocking traffic — otherwise you’ll be fielding helpdesk tickets all day from people who can’t access legitimate sites 😥😉
Conclusion
In this post, we took TLS inspection beyond just blocking social media sites. We used it to power DLP — detecting and blocking a file containing US Social Security Numbers before it could reach Google Drive. The upload never made it out. Gateway decrypted the traffic, scanned the payload, matched the SSN pattern, and killed the request. That’s the real payoff of TLS inspection.
In an enterprise environment, this isn’t optional. Between employees moving data to personal storage and compromised endpoints trying to exfiltrate to C2 servers, encrypted traffic is the primary channel for data leaving your network. If your security stack can’t look inside it, you’re operating blind. TLS inspection is the foundation — DLP, malware scanning, everything else sits on top of it.